What's New

My Brand New Sentimentally Yours 2017 Xmas Stencils are now available at www.honeypotcrafts.co.uk!

Sunday, 28 June 2015

Craftathons are back!!

Good Afternoon Everyone

I have no idea where the sunshine went, but it certainly isn't here in Nottingham at the moment!

That said, it's given me an opportunity to catch up on things so,..

I'm so, so excited to tell you that (by persistent nagging), my Craftathons are back!

Craftathons are my all day workshops, now held in a brand new venue (5 mins from my shop), with loads of space, room to park and even space for me to set up a stand like I do at the craft shows :-)

It's probably easier to show you the flyer:--- here you go...
(click the picture to make it big enough to read)


I can tell you that only half of the spaces are left already, so if you want to join us, for what will, undoubtedly be, a fab day of crafting, tea (or coffee or juice lol) and fun, you need to be quick'ish :-)

I can't wait!

Hope to see some of you there!

Happy Crafting!


Friday, 26 June 2015

Part 2 of ... It all starts with plain white cardstock!

Good Evening Everyone

Remember the post I did a few days ago, where I showed you the 2 versions of the cards I made, all from plain white cardstock,.. 1 with my Chic Pumpkin Range of Cosmic Shimmer Products and the other with my Decadent Bamboo range of Cosmic Shimmer Products?..

Well, I told you I'd done a third version in Decadent Denim, but I had to leave it at the shop as the pearl PVA glue hadn't dried,... here it is!

This is the first ever card that I will give away from my Blog (copying my partners in craft, Julia Watts & Sue Wilson) lol, and I will do this every week, but it will start again next Monday, and be every Monday thereafter,..

I'll draw a name at random on Friday, next week (4th July) for someone to win this Decadent Denim version of my card and I will notify you via a post on the Blog.

Simply leave a comment below (all nice, of course) lol

(you must also be a follower of my Blog to be eligible)(if you are not sure how to do this, just click the 'Join This Site' button, which is on the right side of the Blog page, about halfway down)

Anyhoo,.. here are the photos of the Decadent Denim version of my card,.. hope you like it :-)

I know I like a card if I have taken the time to replicate it in three colourways! ha ha

Happy Crafting and Good Luck!!


Wednesday, 24 June 2015

Introducing...... 'Staged Sentiments'.....

Good Morning Everyone

I have some very exciting news for you...

My brand new product has now been 'officially' released!!

Staged Sentiments in mdf by Phill Martin

These are beautifully detailed, intricate, delicate laser cut mdf sentiments that slot into an oval base (the stage) so they stand upright.

Featuring a row of hearts on the base of the sentiment and 3 hearts within the sentiment itself, for that co-ordinated look :-)

I've designed these (as you would expect from me) to be detailed, in proportion and to be easy to post,.. they will fit into an A4 padded envelope, if you wish to send them as gifts etc, (just remember not to stick the sentiment into the base, so it stays flat, then the recipient can do that when they get it)

I am so excited about these and, if you've been to any of the big craft shows this year, you will have seen my samples in 'real life' and had to endure listening to me enthuse about them! ha ha

So easy to decorate too!,.. you can use all your favourite techniques to decorate them,.. inks, paints, crackle paints, gilding wax, gilding flakes,.. the list goes on and on...!

On the samples below, I have used Cosmic Shimmer Chalk Paint (for the base layer), Cosmic Shimmer Crackle Paint (for the top layer) and decorated with Creative Expressions Self Adhesive Pearl Strips (around the stage), then finished off by die cutting loads of flowers using the scraps of papers I have from my Decadent Damask and Chic Floral 8x8 Paper Pads...

I must say a special thank you to my sister, Mill (long story, but her real name is Karen) and my Aunty Sue (her real name is, er.... Aunty Sue) lol :-) who have helped make some of the samples below..


Dream Staged Sentiment 
Inspire Staged Sentiment
Special Couple Staged Sentiment
Happy Birthday Staged Sentiment
Create Staged Sentiment
Craft Staged Sentiment
Home Staged Sentiment
Love Staged Sentiment
Mr & Mr Staged Sentiment
Mrs & Mrs Staged Sentiment
Family Staged Sentiment
Mr & Mrs Staged Sentiment


Most of my Staged Sentiments are available now on my website here: Staged Sentiments in mdf by Phill Martin


Anyhoo, I really hope you like this fabulous new product,.. makes a great gift, makes a great piece of home decor for yourself and they really are something special :-) and, more to the point, they are designed with crafters in mind, so easy to do, fun to decorate and add your own style and finishing touches :-)

Remember: you can 'Pin' any of these photos to your own Pinterest Boards (or Facebook etc),.. just hover your mouse over the photo's and it gives you little buttons with various options of places to share the photos etc 
:-)

Happy Crafting!


Saturday, 20 June 2015

It all starts with,... plain white cardstock!

Good Afternoon Everyone

It's just started to rain (again), so, I've mashed myself a cuppa and thought I'd shock you all by writing a blog post :-)

If I'm honest, it's this weeks class project that has reminded me "I should use my blog more", as I absolutely loved making this card,.. so much so, that I made the same card in 3 different colour ways (Denim version is still drying at the shop... those pesky Pearl PVA glues,.. making me wait for drying time) ha ha

So, as you'd expect from me,. I start with plain white cardstock, then I decide which of my lovely Cosmic Shimmer sets to 'play' with, then it all goes from there,..

I always have a 'vague idea' of what I want to achieve, but (as most of us do), I change those ideas as I go!

I decided on Chic Pumpkin.. which is a lovely, burnt orange colour..

Here's what I used:

White Cardstock :-)
Decadent Damask Inspirational Phrases Stamp Set by, erm, me lol
Chic Pumpkin Ink Mister
Chic Pumpkin Gilding Wax
Chic Pumpkin Twinkles
Delicate Daisies Dies by Sue
French Collection Corner, Border and Tag Die Set by Sue
A4 Wild Roses Embossing Folder
St Kitts Die Set by Sue

And here's what I did:

This is an 8x8 card.
I cut two layers for the base of this card (one 19.5cm square, which I then pierced all the way around, then another, 18.5cm square, which I gave a light'ish misting with the Chic Pumpkin Ink Mister)

The narrowest piece of white card that was left over from the 19.5cm piece I cut was embossed with the beautiful Wild Roses embossing folder.

I cut two borders from the French Collection dies and these were stuck underneath the embossed piece and attached to the card using foam tape for dimension.

I cut the centre piece from the St Kitts die set, using the two larger dies together and then the larger die on its' own (this one was given the light'ish dusting of the Chic Pumpkin Ink Mister) and the two were stuck together with Cosmic Shimmer glue, I also cut the extra centre for the sentiment with the ST Kitts die set.

I stamped my sentiment from my lovely Damask Inspirational Phrases Stamp Set, using my Black Soot distress ink pad.

The edges of the sentiment area were inked using the Chic Pumpkin Ink Mister (just spray onto your craft sheet and pick some ink up with your Cut n Dry foam), this centre was attached to the topper with foam tape and the topper was attached to the card with a double layer of foam tape, for extra dimension.

The flowers were created using Sues' Delicate Daisies dies (complete petal), each flower was finished in the centre using the Chic Pumpkin Gilding Wax and a teeny drop of the Chic Pumpkin Twinkles.

I finished off by adding a couple of pearls using teh Chic Pumpkin Pearl PVA glue on the centre topper and on the four corners of the card.


I hope you like this card,.. I really enjoyed making it and, here's one of the other colour ways I did,..

This is the Decadent Bamboo version.. :-)


Happy Crafting!

Remember: you can 'Pin' any of these photos to your own Pinterest Boards (or Facebook etc),.. just hover your mouse over the photo's and it gives you little buttons with various options of places to share the photos etc 
:-)


Wednesday, 18 February 2015

A little bit 'Decadent' :-)

Good Afternoon Everyone

Well, I've just spent a hectic 3 days at the NEC for our trade show, with the rest of the Creative Expressions team,.. launching all our brand new products (exciting times!), it's so nice to get to spend time with everyone as usually it's a phone call, text or an email!
And, of course, we are never at Create & Craft at the same time so no chance to catch up in the green room...

It's also been lovely meeting and chatting with all the craft shop owners who stock my products.

Here we all are :-)

So, with all the 'newness' in mind,.. I wanted to tell you about my next shows on Create & Craft, which are next Tuesday, 24th February at 10am and 3pm, where I will be launching my new range of Cosmic Shimmer products, in 6 brand new colours, which I have called 'Decadent', with more products added to the line up,.. one of which is our brand new blending ink, called colour cloud, and (as you'd expect from me), it will be available in my 6 new colours,.. I absolutely love this product and I can't wait to show you!!!

There will also be 9 brand new Decadent Damask sets of stamps, a brand new co-ordinating 8x8 paper pad and a brand new addition to the paper pad range (can't wait to show you this too!)

I don't want to say too much as it will spoil the excitement for showing you on TV next week, but I will tell you the new colours, which are:

Decadent Teal
Decadent Oak
Decadent Grape
Decadent Wine
Decadent Denim
Decadent Bamboo

These new colours are very different from the Graceful Collection and I love them!!

Anyhoo,.. I've rattle on long enough! So, here's a big card I made using some of the Decadent Teal products and one of the sentiment stamps from the Decadent Damask range :-)

Hope you like it..


See you on C & C next Tuesday,..


Sunday, 8 February 2015

Graceful Mustard... Just For You! :-)

Good Afternoon Everyone

It's a lovely, sunny, Sunday afternoon so I thought I would share this lovely, sunny card with you :-)
This is the card we did at my workshops this week,.. it was also re-created in other colours from my Graceful collection of Cosmic Shimmer products by some of the class and, I have to say, they all looked equally beautiful!

What I Used:
A4 White Cardstock
My Graceful Mustard Ink Mister
My Graceful Mustard Pearl PVA
My Graceful Mustard Mica Powder
Sentimentally Yours Baroque Sentiments Stamps
Sentimentally Yours Leafy Background Stamp
Sea Garden A4 Embossing Folder by Sue Wilson
Scandinavian Collection Corner, Border & Tag Die Set by Sue Wilson
Large, Big and Super Daisy Punches by Woodware
Cosmic Shimmer Sparkle Star Twinkles


The card was created using 1 sheet of A4, cut in half, scored at 2.5cm and glued at the top, using the fold as a guide,.. this is one of my favourite shapes as you can add the little fancy decoration above the score line :-)

The top half of the main part was misted (lightly) with the mustard mister, left to dry and then embossed with the beautiful Sea Garden embossing folder... it creates a lovely, tonal effect and the embossing brings some texture.

The bottom half was stamped using my Leafy Background stamp, the 'ink' was created using a few mists from the mustard ink mister, then a tiny amount of the mustard mica powder mixed into the ink, this gives you a beautiful, pearlescent, mustard 'ink' that you can apply direct to the stamp with a piece of cut and dry foam. (you can't tell from the photo, but the pattern is pearlescent when the light catches it)
I also used the 'ink' that was left on the foam to finish off the very edge of the top of the card too :-)

The flowers were created using the varying sizes of daisy punches, some misted with the mustard
mister, some left white,.. each was finished with a good squeeze of the mustard pearl pva glue, which, once it dries, gives you a really pretty centre to your flowers,.. in (as you'd expect from me) a completely co-ordinated colour scheme :-)

The sentiment was stamped in black soot distress ink (must have!) using my Baroque Sentiments Stamps and by masking off the detailed designs on the stamp with removable tape.
Anyhoo,.. I hope you like it,..
If you have any of my Graceful Cosmic Shimmer products, have a go at this card,.. :-)

Happy Crafting!


Tuesday, 25 November 2014

Mintylicious......

Good Morning Everyone

It's a little nippy outside so, I've made myself a cuppa and thought I'd show you one of my sample cards that I made using my latest range of stamps and cosmic shimmer products in more detail.

Ingredient List (with links to go get them from my wesbite :-)
8x8 Card Blank
Graceful Butterflies & Dragonflies 8x8 Paper Pad
Graceful Mint Embossing Powder
Graceful Mint Twinkles
Graceful Mint Pearl PVA Glue
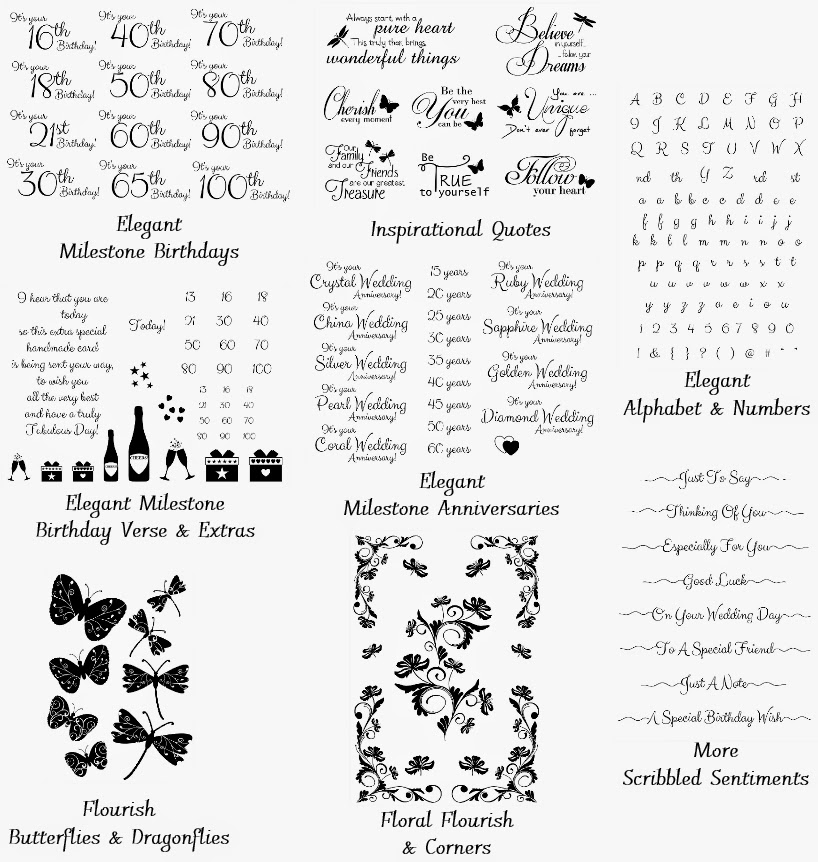
Elegant Milestone Birthdays Stamps
More Scribbled Sentiments Stamps
A4 Climbing Vines Embossing Folder
Dies by Sue Wilson French Collection - Provence
Dies by Sue Wilson Finishing Touches - Delicate Daisies (Full Petals)


This is quite an easy card to put together,.. there are just lots of components to create before assembly, but, the pleasure is in the creation of the components and then, when you see it all together, you think,... yep,.. it was worth it! lol

8x8 cards are a great size to work with,.. plenty of space to decorate without being overpowering and not too expensive to post (if you use the right adhesives!.. I try to stick to Cosmic Shimmer acrylic glue and foam pads where possible as some of the glue gels can be heavy if you use lots on your card)

I started, as I always do, by deciding which colour scheme I wanted, with 6 lovely new colours in my Cosmic Shimmer range, that wasn't as easy as I thought! I opted for the Graceful Mint :-)

I die cut several of the delicate daisies from the reverse of a couple of sheets of the mint papers from the Graceful Butterflies & Dragonflies paper pad, ensuring I got two different shades of mint. The tips of some of the flowers were then pushed onto my perfect medium pad, then embossed with the Graceful Mint Lustre Embossing Powder. I didn't pay much attention to how neat they were, as the overall effect was to be random, but how lovely does the pearlescent finish of the embossing powder look on those petals? It was worth the time!


I then cut a piece of white card to 16cm x 16cm and cut an aperture in the centre, the 'frame' was then embossed with the beautiful Climbing Vines embossing folder.

I cut one of the plain shapes from the Provence dies, stamped the sentiment from the Elegany Milestone Birthdays Stamps (black soot distress ink) and then decorated the top, bottom and corners with the Graceful Mint Pearl PVA Glue and put this to one side to allow them to dry.

I created two smaller layers than the card, one with a sheet from the Graceful Butterflies & Dragonflies paper pad and one from plain white card.
I stamped the sentiment from the More Scribbled Sentiments Stamps on all four sides and added a cheeky '50' in each corner lol
The two layers were then stuck onto my card blank.

I cut another piece of paper from the pad, the beautiful lacy mint one, to 16cm x 16cm then, using foam pads, I stuck this together with the embossed frame,.. this is a great way to create interest to frames/apertures too,.. the pretty paper makes a lovely backdrop to the frame. This was then stuck onto the centre of the card.


Now, the fun (and easiest) part, the assembly!
Once the frame and layers are on your card, it really is just a matter of popping the die cut shape with the sentiment onto some foam pads and putting it in the centre of the frame (make sure your pearls have dried, we don't want flat pearls lol)
Then, just arrange your flowers as you wish, I used Cosmic Shimmer Acrylic glue to fix them as it dries quickly and doesn't leave a mess!
The centre of the smaller flowers was then filled with the Graceful Mint Twinkles and the larger ones had a mini dazzler :-)

It probably took me about an hour to do this card, the embossing of the flower petals takes a while to do, but the lustre and pearly finish create a beautiful effect once it's all together.

Anyhoo, I hope you like this card,.. why not try it in one of the other lovely colours in the paper pad and co-ordinating Cosmic Shimmer products :-)

All the goodies I've used are available on my website, just use the links on the ingredient list to take you there and if you treat yourself to one of the paper pads and you'd like me to sign it for you, just email me, I'm happy to! :-)

Happy Crafting!


Sunday, 23 November 2014

I'm feeling....... good! :-)

Good Afternoon Everyone,..

OK, I'm the worst blogger ever! lol

It's only because I'm busy designing new crafty loveliness for you :-)

I have to just say thank you to you all too,.. my latest range of Stamps, Paper Pad and Cosmic Shimmer products have been flying off shelves everywhere, to the point that even I have struggled to keep my stock maintained in my own shop! lol

If you've bought your goodies already, I hope you have been making fabulous things with them!

My aim is to bring you great quality products that work well on their own, together, or with all the crafty stash you already have,..

This is why I always give you the Cosmic Shimmer Range in co-ordinating colours to the paper pads,.. and stamp sets that work well on their own or when combined with others (like the Elegant Alphabet & Numbers set,.. perfect on its' own or with the Scribbled Sentiments as it's the same font!) the hard work is done, which means you get to have the fun part, creating great cards and crafty projects without worrying about matching colours and products etc

If you haven't seen the latest range yet (or treated yourself to any), here are a couple of photos with links to the relevant section on my website for you to get them :-)

The Stamps


The Paper Pad & Cosmic Shimmer Range


Anyhoo, enough rattling on,..

I wanted to give you something,.. a freebie,.. a 'Thank You' of sorts, for all your support and for trusting me and my designs enough to spend your hard earned crafty cash on them!

So, here's a lovely 8x8 paper, designed by myself,.. it was meant to be a part of the new Graceful Butterflies & Dragonflies Paper Pad that I launched a few weeks ago, but I decided on a softer colour scheme... but, I also love monochrome so didn't want to waste it!
Feel free to save this paper, print it and use it as much as you want (all I ask is that you don't sell is as a printed sheet and please tell people it's my design (if they ask!)


Happy Crafting!


Monday, 29 September 2014

Time for a cuppa anyone?

Good Afternoon Everyone,..

Now I'm on a Blog Roll (so to speak), I thought I'd share one last sneaky peek of one of my card samples for my shows on Create & Craft tomorrow :-)

It's another biggy! 21cm x 15.5cm :-)

If you know me, you will know that this is the perfect card for me,.. there are tea bags, tea cups and more on here!

This is one of my brand new stamp sets, aptly named 'Time For A Cuppa' and it's a montage set,.. I adore the montage sets because there is so much you can do with them!
Of course, I 'had' to create a background stamp to go with this set too, so I could get my fave tea brand on it :-) lol

I think there is something that just about every tea or coffee lover will like about these stamps!

Anyhoo, here it was I used:-

White cardstock (lots of!)
Creative Expressions A4 Sea Garden Embossing Folder
Sue Wilson Californian Collection Dies (Hollywood and Frames Set A)
Gathered Twigs Distress Ink Pad
Sentimentally Yours Time For A Cuppa Montage Stamps
Sentimentally Yours Tea & Coffee Background Stamp
Sentimentally Yours Baroque Sentiments 2 Stamps
Cosmic Shimmer White Pearl PVA Glue
Cosmic Shimmer Choco Brown Pearl PVA Glue
Square Dazzler
Brown Seam Binding Ribbon
Couple of Pearl Hatpins

Remember, my show times are 8am and 3pm tomorrow.

You can pre order all of my new stamps sets and most of the goodies I have chosen to go with them on my show directly from my website here

Hope you like it, I love this card :-)

Happy Crafting!


Thursday, 25 September 2014

I know,.. I know.... I'm a terrible Blogger!, But......

Good Afternoon Everyone

I know,... I've been a terrible Blogger of late,... rest assured, my mate, Julia Watts, reprimanded me severely at Ally Pally last weekend :-)

In my defense, I have been rather busy with designing new stamps,.. and more!

I also have been working hard with Creative Expressions to bring you my own range of co-ordinating Cosmic Shimmer products to go with my Vintage Christmas Paper Pad,..

In early October, you will be able to get Ink Misters, Pearl PVA Glues, Polished Silk Glitters, Gilding Wax, Mica Powders, Twinkles (sparkly glue!) all in perfectly co-ordinating colours,..

Creative Expressions and I have worked so hard to get the colours perfect!, you know I'm a bit of a perfectionist when it comes to matching colours and I wanted the same for all of you too, so you don't have to 'make do' and spend hours searching for products to go with everything!

These new products will (hopefully!) be launching on my 11th October shows on Create & Craft and, yes, I'm a tad excited! lol

Anyhoo, because I've been a naughty Blogger, I'm going to give you a sneaky peek photo of one of my card samples for my shows on Create and Craft next Tuesday, 30th September 8am and 3pm

This is a big card! 21cm x 15.5cm

To make this card, I used.. quite a bit lol

Spellbinders Enchanted Labels 28
Spellbinders Labels 28
Couture Creation Dragonfly Die
Creative Expressions A4 Quilted Flower Embossing Folder
Creative Expressions Micro Glass Beads
Cosmic Shimmer Aurora Twinkles
Evergreen Bough and Peacock Feathers Distress Ink Pads
Cosmic Shimmer Teal Sky Pearl PVA Glue
Sentimentally Yours Dragonfly Montage Stamps (NEW)
Sentimentally Yours Dragonfly Retreat Background Stamp (NEW)
Sentimentally Yours Scribbled Sentiments (NEW)
Lots of white cardstock lol


Happy Crafting!
(Promise I'll be a better Blogger! lol)