What's New

My Brand New Sentimentally Yours 2017 Xmas Stencils are now available at www.honeypotcrafts.co.uk!

Friday 31 July 2015

Decadent Damask Teal - Just A Note

Good Morning Everyone,

Thank You all for your lovely comments on my previous blog.

As I enjoyed making the last card so much and the products are still out on my craft desk I decided to create a slightly different version but using the lovely Decadent Teal.

I Hope you like this one as much as I do:-

Products Used:- (which are also links to Phill's Website too) :-)


8 x 8 Cream Card Blank
Cream Card Stock
Sentimentally Yours Decadent Damask Occasions A5 Stamps
Decadent Teal Colour Cloud
Phill Martin Decadent Teal PVA
Phill Martin Decadent Teal Twinkles
Phill Martin Decadent Teal Ink Mister
Decadent Damask Paper Pad
Sue Wilson Caribbean Collection Border, Accent & Tag Dies
Spell Binder Decorative Labels Twenty Eight


Matting & Layering

8 x 8 Card Blank

1st layer cream card cut to 7.75 x 7.75

2nd layer Cream Card cut to 7.5 x 7.5

3rd layer Decadent Damask Teal Paper cut to 7.25 x 7.25

4 pieces of cream card....... 2 cut to 2 x 7.75  and 2 cut to 1.5 x 7.75

Taking the 7.75 square cream card I used the NEW  Decadent Teal Colour Cloud to ink the edges. Then attached all 3 layers to the base card.

Next I took a piece of 2 x 7.75 and 1.5 x 7.75 cream card and using the Inner Border Die I cut both out, then attached the 2 together - repeat this with the remaining 2 pieces, then attach both to the card lining up with the inner cream layer and the outer teal layer.


Sentiment

Using Spellbinder Labels Twenty Eight I cut the largest three out.
I then sprayed the largest with Decadent Teal Mister Spray.

Then with the smallest of the three I stamped this using the New Decadent Teal Colour Cloud and the Decadent Damask Occasion Stamp.

I attached the largest one to the card flat using Cosmic Shimmer Glue, the second two I attached with pads to give dimension.


Finishing Touches

I added Twinkles to the edges of the Border Dies and also around the edge of the second largest Label Die.
The topper i decorated with Pearl PVA.

Finally I made a triple bow using Seam Binding and added a large Dazzler.


Happy Crafting......


Thursday 30 July 2015

Decadent Damask Oak - Best Wishes

Good Morning Everyone,


Thank you all very much for such lovely comments on my previous blog.


Today's card is an 8 x 8
 I particularly enjoyed creating this card, its so nice to be able to colour match everything, and I love the NEW Colour Cloud Blending Inks.

Products Used:- (which are also links to Phill's Website too) :-)

8 x 8 Cream Card Blank
Cream Card
Decadent Damask Border & Icon Collection A6 stamps
Decadent Damask Everyday Sentiments A5 stamps
Decadent Damask Paper Pad
Phill Martin Cosmic Shimmer Ink Mister Spray Decadent Oak
Phill Martin Cosmic Shimmer PVA Pearl Decadent Oak
Phill Martin Cosmic Shimmer Twinkles Decadent Oak
Decadent Oak Colour Cloud ,
Sue Wilson Caribbean Collection Border, Accent & Tag Dies
Spellbinder Decorative Labels Twenty Eight Dies
Seam binding
Dazzlers


Matting & Layering

8 x 8 Card Blank

1st layer Cream Card cut to 7.75 x 7.75
2nd layer Decadent Oak Patterned Paper cut to 7.5 x 7.5

4 pieces of cream card
1st cut to 4.5 x 7.75
2nd cut to 4 x 7.75
3rd cut to 3.5 x 7.75
4th cut to 3.5 x 7.75

Starting with the 7.75 square cream card I used the NEW Decadent Oak Colour Cloud to ink around the edges of the card. I then attached this and the patterned Decadent Damask paper to the base card.

Next taking the 4 pieces of cream card and the Inner Border Tag I cut each piece of card, Once this was complete I used the smallest and medium size stamps from the Decadent Damask Border & Icon Collection and randomly stamped the smallest piece of card using first and second generation.
Once this was dry I attached all the layers together, then added a strip of seam binding securing this on the reverse before attaching this to the main card.


Sentiment

Using Spellbinders Labels Twenty Eight and the second largest die I cut this out and then sprayed it with Decadent Oak  Mister Spray. While this was drying which is only a couple of minutes, I cut the third largest die. I then stamped this using the Decadent Oak Colour Cloud and the Decadent Damask Everyday Sentiment Stamps.
These were then attached to the card using pads on both to give dimension


Finishing Touches

I made a triple bow and swags and attached to the seam binding strip, then added a matching Dazzler.

Then to the Decorative Border edges I added the the Twinkles - once this was dry I curled each layer.

Finally I added Decadent Oak PVA to the sentiment.


                     Happy Crafting


Wednesday 29 July 2015

New Cosmic Shimmer Colour Reveal, no.6 - Frosty Blossom

Good Morning Everyone

As promised, here is the final reveal of my new Cosmic Shimmer Colour no.3, which is,.. Frosty Blossom :-)

Now, I'm not really a pink person, but I love this tone!! I'm really pleased with it!

This is a really beautiful dusky shade with a hint of vintage about it,.., the colour is also reflected in the new Frosty Christmas Holly Paper and Insert Pads too :-)

Here is what I used:
Sentimentally Yours Christmas Holly Sentiment Border Stamps
Sentimentally Yours Christmas Holly Background Stamp
Frosty Blossom PVA Glue
Frosty Blossom Ink Mister
Frosty Blossom Gilding Wax
Frosty Blossom Colour Cloud Blending Ink
Dies by Sue Wilson Ornate Pierced Design Noble
Cosmic Shimmer Silver Shine Detail Embossing Powder
Glitter Jewels - Glacier Ice (my fave)
Dies by Sue Wilson Holly Sprays


Here is the card
Taking an 8x8 card blank as my base, I created 2 more layers, one at 19.5cm square and another at 19cm square.
The 19.5cm square was given the gilding wax treatment around the edge, to give the lovely pearlescent frosty blossom shade.
The 19cm square layer was embossed with the linen texture embossing folder.

I cut the two largest pieced dies from the Noble die set, this then gave me a frame and an inside die cut.The frame was ink misted with the Frosty Blossom Ink Mister and the inside layer was stamped with my lovely Christmas Holly Background stamp and the Colour Cloud Blending ink,.. this gives me the perfect match to the rest of the Frosty Blossom products.

The fab Christmas Holly Sentiment Border stamp was stamped onto a 2.5cm x 20cm strip with perfect medium and embossed with the silver shine detail embossing powder.
I cut a 'V' into one end of the strip and inked all round the edges with the colour cloud blending ink, then went round the edge of this strip and the inside and outside edges of the frame with Cosmic Shimmer glue and dipped it into the Glacier Ice glitter jewels :-)

I die cut two Holly Sprays and added the Frosty Blossom pearl pva to the areas for berries. Once dry, I added Glacier Ice to the Holly leaves.

The seam binding ribbon was white so I coloured it with the Frosty Blossom colour cloud (using smoothie sponges) and, once dry, I created a big triple bow and added an extra 2 sets of 'tails'.

The assembly was easy..
The gilding wax layer and embossed layer are stuck on flat with Cosmic Shimmer glue, the ink misted frame was stuck on with foam tape for dimension, then the Christmas Holly background layer was stuck inside with glue.

The small centre die cut is on foam tape and the sentiment border is just glued into place at the lowest points (once shaped)

The holly sprays went on next with glue and finally the bow, with glue..

My final finishing touches were the dazzler and a few pearls in each corner.

Hope you've enjoyed seeing all the new Frosty Colours,.. you can get them on my website now here..


So, your 6 brand new Cosmic Shimmer colours are
Frosty Aqua, Frosty Jade, Frosty Heather, Frosty Blossom, Frosty Sky and Frosty Mink


Happy Crafting!


Tuesday 28 July 2015

New Cosmic Shimmer Colour, Reveal no.5 - Frosty Aqua

Good Morning Everyone

As promised, here is the reveal of my new Cosmic Shimmer Colour no.5, which is,.. Frosty Aqua :-)

This is a really beautiful turquoise/green shade with a lovely fresh look,.., the colour is also reflected in the new Frosty Christmas Holly Paper and Insert Pads too :-)

Here is the card..
It's an 8x8 and I will give you all the instructions on day 6, with the final colour reveal :-)

I've done the exact same card in all 6 new colour ways, it's my favourite way of showing you how different they all look :-)

Here is the card


And here is your close up


Hope you like it :-)

Final colour reveal tomorrow!!

Happy Crafting!


Monday 27 July 2015

New Cosmic Shimmer Colour, Reveal no.4 - Frosty Mink

Good Evening Everyone

Sorry it's late,.. busy day,.. back at Creative Expressions HQ for a retailer workshop and busy as soon as I got home (you know me!)

As promised, here is the reveal of my new Cosmic Shimmer Colour no.4, which is,.. Frosty Mink :-)

Another lovely colour, in my humble opinion, a lovely mid brown/beige tone that has a vintage, dusky look,.., the colour is also reflected in the new Frosty Christmas Holly Paper and Insert Pads too :-)

I must confess, this is probably (along with Frosty Jade and Frosty Heather) my favourite!

It's an 8x8, the same as the others (are you bored with them yet?!) lol :-)

I've done the exact same card in all 6 new colour ways, it's my favourite way of showing you how different they all look :-)

Here's the card


And here's your close up 


Hope you like it!

Only two more colours to go :-)

Happy Crafting!


Sunday 26 July 2015

Cosmic Shimmer New Colour Reveal No.3 - Frosty Heather

Good Afternoon Everyone

As promised, here is the reveal of my new Cosmic Shimmer Colour no.3, which is,.. Frosty Heather :-)

This is a really beautiful lavender/lilac shade with a lovely aubergine undertone,.., the colour is also reflected in the new Frosty Christmas Holly Paper and Insert Pads too :-)

Here is the card..
It's an 8x8 and I will give you all the instructions on day 6, with the final colour reveal :-)

I've done the exact same card in all 6 new colour ways, it's my favourite way of showing you how different they all look :-)


And here;s your close up..


Hope you're having a great day!

Until tomorrow!

Happy Crafting!


Saturday 25 July 2015

Cosmic Shimmer Colour Reveal, no.2 - Frosty Sky

Good Morning Everyone

As promised, here is the reveal of my new Cosmic Shimmer Colour no.2, which is,.. Frosty Sky :-)

This is a really beautiful blue shade, which, actually looks 'frosty' when you add a touch of glitter, the colour is also reflected in the new Frosty Christmas Holly Paper and Insert Pads too :-)

Here is the card..
It's an 8x8 and I will give you all the instructions on day 6, with the final colour reveal :-)


And here's your close up..


Have a great weekend!

Happy Crafting!


Friday 24 July 2015

Christmas Greetings in my new Frosty Jade!

Good Morning Everyone

It's been such a busy week this week, but I really wanted to show you these cards that I made over the last weekend, using my 6 new Frosty Cosmic Shimmer Colour Collections!
(these will be available on my website early next week)

The new colours are...
Frosty Blossom, Frosty Sky, Frosty Jade, Frosty Heather, Frosty Aqua and Frosty Mink :-)

I had such fun making these cards,.. I love being able to do the same card in all 6 colour ways,.. how do I choose a favourite? I can't! I love them all! :-)

I'm going to show you one each day, for the next 6 days :-)

You may remember me showing you little teaser photos on my Facebook and Twitter pages as I was creating these cards,.. the bows, the border sentiments etc,.  :-)

OK,.. It will take me ages to tell you how I made this card and, to be honest, I have to get ready to go to my shop soon for a workshop this afternoon, so I'll do that for you over the weekend and link it back to this post :-)

I can tell you that all the stamps I've used are on my website and they are from my 2015 Christmas Holly Collection..

I can also tell you that I have now, finally!, got my brand new 2015 Frosty Christmas Holly 8x8 Paper Pad and Insert Pads in stock and on my website!!

These, as you'd expect from me, are designed to perfectly co-ordinate with the complete range of Christmas Holly Stamps and the 6 new Frosty Cosmic Shimmer Colours :-)

Here's a little taster,.. :-)

The Insert Pad

The Paper Pad


The first of the 6 cards in --- Frosty Jade!

A close up of the embossed sentiment border stamp and background stamp :-)

Hope you like it - I love this colour!

More tomorrow!

Happy Crafting!


Wednesday 22 July 2015

Gold Embossed Season's Greetings - Giveaway Card

Good Morning Everyone

I'll be heading off to Creative Expressions HQ today for a retailer demonstration day with my colleagues from Creative Expressions,..

I'll be demonstrating my new Christmas Holly Collection of stamps, paper pads and my 6 new Cosmic Shimmer colours .. should be fun!
(you'll be able to get the paper pads and cosmic colours from my website this week)

Anyhoo,..
I've been so busy these last few weeks that I haven't done a giveway card (shocking, I know), so, I am going to give away one of my favourite new samples of a card I made using my new Christmas Holly Decorative Frame and Insert Frame stamps,..

Now, this 8x8 card took me a fair bit of time, what with all the embossing and glittering and I'm heading off soon so I won't give details of how I made it today, I'll do that over the next few days,..

I'll tell you what I used though...
(they are all links to the products on my www to, in case you 'need' to purchase them) :-)

Sentimentally Yours Christmas Holly Flourishes A5 Stamp Set
Sentimentally Yours Christmas Holly Decorative Frame  Stamp - Lattice
Sentimentally Yours Insert Frame Stamp - Season's Greetings
Cosmic Shimmer Detail Embossing Powder - Gold
Sue Wilsons' Stick Pin Elements
Creative Expressions Dazzlers


And here's the card :-)


And here's a little close up of the lovely lattice in the stamps :-)


To be in with a chance of winning this card, you must be a follower of my Blog and leave a comment on this post,.. The draw will close at 9am next Monday (27th July) and I will choose a winner randomly at that time.

Suzanne - I haven't forgotten you, just been really busy! I'll get your winning card off to you tomorrow :-)

Remember: you can 'Pin' any of these photos to your own Pinterest Boards (or Facebook etc),.. just hover your mouse over the photo's and it gives you little buttons with various options of places to share the photos etc 

Good Luck!

Happy Crafting!


Tuesday 21 July 2015

Just For You - Featuring Decadent Damask Border Stamps and Graceful Mint Texture Paste

Good Morning Everyone

Today's Card is an 8 x 8


Products Used:- (which are also links to Phill's Website too) :-)


8 x 8 White Card Blank
Black Card Stock
Decadent Damask Sentiment Border Stamps
Sparkle Texture Paste Graceful Mint
Creative Expressions Triple Scallop Mask
Sue Wilson Daisy Die Complete Petals
Sue Wilson Daisy Die Open Petals
Sue Wilson Finishing Touches Curled Vines
Twinkles
Distress Inks


Normally I would start a card and work from the base upwards, but today's card I started with the centre feature which is the Texture Paste as this takes a while to dry ( I like to leave mine overnight).

So starting with a 6 x 6 blank piece of white card I lined up the mask and taped it down, then spread the Texture Paste even;y over the mask, once this is done remove the tape and carefully peel off the mask taking care not to disturb the texture paste. (put this somewhere safe to dry)
While waiting for this to dry I cut a piece of black card to 7.75 x 7.75 and attached it to the 8 x 8 card blank.

Next I cut a piece of white card to 7.5 x 7.5 then using the Decadent Damask Sentiment Border Stamp and Black Soot Distress Ink I stamped the Sentiment around the edges and attached this flat to the car

I then cut a piece of black card to 5.5 x 5.5 and attached this to the card using pads to give dimension.

Once I was happy that the Texture Paste was completely dry, I trimmed it down to 5,25 x 5,25 and attached to the centre of the card.

Using off cuts of card I cut and shaped the flowers and curled vines and attached them to the card.
On each of the white petals I added Mint Twinkles to the edges and finished off with a Dazzler to the centres.


                                                              Happy Crafting


Saturday 18 July 2015

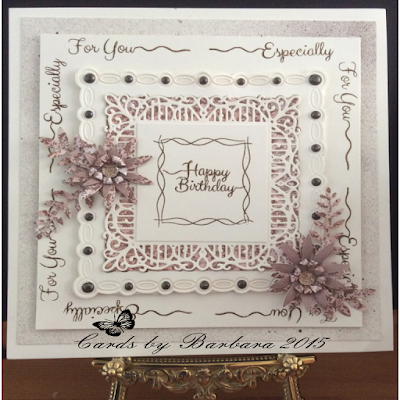
'Especially For You' - Featuring the NEW Scribbled Corners and the NEW Scribbled Frame Stamps

Good Afternoon Everyone,

Phill is very busy in his shop what with running a class and designing new and exciting products for us all, he needs more hours in his day.

I am posting the blog today but Phill will be back to do the next blog to which some lucky winner will be receiving a card from him.


Today's card is an 8 x 8

Products Used : ( which are links to the items on Phill's website too) :-)


8 x 8 Card Blanks
Decadent Oak Mister Spray
Decadent Oak PVA
Decadent Damask Paper Pad
Scribbled Corner Sentiments
Scribbled Frame Sentiments
Sue Wilson Dies New York Collection - Madison Square
Spellbinder Blooms Four
Woodware Leaf Punch
Dazzlers
Distress Inks


8 x 8 Card Blank

1st layer Ivory Card cut to 7.75 x 7.75

2nd layer Ivory card cut to 6.5 x 6.5

Using the 7.75 square card I sprayed this with Decadent Oak Mister Spray and attached to the main card.

Then taking the 6.5 square card I stamped each corner using the NEW Scribbled Corner Sentiments.

Then attached this to the card using pads to give dimension.


Next I cut out the dies - using the largest die I then added Decadent PVA Pearls around the edge. Once dried I attached to the card using pads.

The second largest die I backed with Decadent Oak Paper from the Damask Paper Pad Collection.

Using a Sentiment from the NEW Scribbled Frame Set to complete the centre feature.


The flowers I created using Spellbinder dies and off cuts of paper, and finally finishing with small dazzlers to the centre of the flowers.


                                                Happy Crafting


Friday 17 July 2015

60th BIRTHDAY CARD IN BLACK AND WHITE

Good Morning Everyone

Once again thank you all for your lovely comments on my previous blog.

After a very hectic week I decided to do a straightforward card for today's blog......
8 x 8 card in the ever popular black and white.

Products used: (which are linked to items on Phill's Website too) :-)


White Card Blanks
White Card Stock
Black Card Stock
Sentimentally Yours Lacy Ovals & Borders
Sue Wilson Daisy Dies Complete Petals
Sue Wilson Daisy Dies Open Petals
Sue Wilson Heart Lattice Embossing Folder
Sue Wilson Finishing Touches Petite Vinery
Sue Wilson Austria Collection Salzburg
Black Soot Distress Ink
Elegant Milestone Birthdays A5 Stamp Set


 Starting with an 8 x 8 White Card Blank

I then did the matting and layering

1st layer Black card cut to 7.75 x 7.75

2nd layer White card cut to 7.5 x 7.5

3rd layer Black card cut to 1.75 x 7.75

4th layer White card cut to 1.5 7.5
Taking the white 7.5 x 7.5 card I embossed this then attached both this and the black card to the main card.


Using the Border Stamp I stamped down both sides of White Panel and attached this to the Black Panel and then attached both down the centre of the card.

Next using the Oval Stamp I stamped this and then cut it out and attached to card.

Using the Die I then cut this out ready for the Sentiment.

Using the 60th Birthday from the Elegant Milestone Birthday
Stamp Set I stamped this using Black Soot Distress Ink.
Then attached to centre of card.


Finally I used the Daisy Dies and Vinery Dies to create  the flowers, then added small Dazzlers to the centres.


                   Happy Crafting........


Thursday 16 July 2015

White & Burgundy Card Featuring Sentimentally Yours Christmas Holly Range

Good Morning Everyone,

Thank you all so much for your lovely comments on my previous posting. I would also like to thank everyone who took the time to come and say 'Hello' at Doncaster at the weekend, it was lovely to meet you all.


Today's card is an 8 x 8

Products used: (which are linked to items on Phill's Website too) :-)

Plain White Card Stock
Burgundy Card Stock
Double Sided  Self Adhesive
Clear Glass Micro Beads
Spellbinder Die
Christmas Holly Collection Verses
Christmas Holly Stamps
Burgundy Seam Binding
Creative Expressions Self Adhesive Pearls
Creative Expressions Pins


Starting with an 8 x 8 White Card Blank

Layer 1 Burgundy Card
cut to 7.5 x 7.5

Layer 2 White Card cut to 7 x 7

Layer 3 Burgundy Card cut to 6.75 x 6.75

Layer 4 White Card cut to 6.5 x 6.5

Double Sided Adhesive cut to 6.5 x 6.5 I then glued layers 1-3 onto the White Card.


Next using layer 4 and Stamps from Sentimentally Yours
New Christmas Holly Collection, I chose Aged Mahogany
Distress Ink to create the background.

Taking the piece of Double Sided Adhesive I peeled back the top corners to line up with layer 4 and carefully removed the backing sheet.

 I then removed  the top sheet to reveal the adhesive and added the Micro Beads. To do this I find it easier to place project into a shallow box or tin before adding beads,
 then surplus beads can be poured back into the jar.


I chose a Spellbinder Die and cut the bottom layer in burgundy and the top in white before adding one of the lovely Sentiments from the New Christmas Holly Collection.

I stamped this with Aged Mahogany to match the background.


I added these to the card using pads.

Next I added the Self Adhesive Pearl Strips around the edge.

Finally I added a triple bow (upside down lol) and stick pins.


                                                             Happy Crafting .......


Tuesday 14 July 2015

Introducing,... Sentimentally Yours Christmas Holly Collection.....

Good Afternoon Everyone

Well, if you met me at Doncaster over the course of last weekend, you will have seen my brand new Christmas Holly Collection of stamps 'in real life', so to speak!

If you missed out on any (as there were a fair few sell outs on day one!!), you can now get them from my website!!

My theme (obviously) for this first Christmas 2015 collection is Holly,..

You can click the photo to make it larger and you can click below to take you to the Christmas section of my website to order yours today.

Christmas Section link

I'll be showing you more samples over the coming weeks to give you some ideas and (hopefully) inspiration, so, all you need is the stamps! :-)

Here's a little taster for you all,..

(PS - there will be a co-ordinating 8x8 paper pad, 8x8 insert pad and 6 brand new Cosmic Shimmer Colour collections to go with them within the next few weeks!)


Happy Crafting!


And the winner of my Decadent Wine Card is......

Good Morning Everyone

As always, thank you so much for taking the time to leave comments on my Blog, I appreciate it!

Anyhoo,
The winner of my Decadent Wine Card is...

Suzanne Corker!!

Suzanne, can you please email me your address etc to phill@honeypotcrafts.co.uk and this 'not so' little lovely will be dropping through your letterbox :-)


BridgetCG, I still haven't had an email with your address to send my Chic Aubergine card,.. please email to the same address,.. if you haven't sent it by next Monday (20th), I will have to redraw for that card...

I'm late with this weeks giveaway card, but I will put the post on asap, so pop back and check if I've done it :-)


Happy Crafting!


Friday 10 July 2015

Christmas Wishes - Sneak Preview

Good morning everyone

Thank you all so much for taking the time to look and comment on my previous post, this is very much appreciated.

Well my case is packed and I am looking forward to a great weekend Summer Crafting at Doncaster Racecourse.

Of course our lovely Phill will be there with new and exciting products for you to purchase, many of which you will see him regularly demonstrating throughout the weekend.

We hope to see lots of old friends and new this weekend, please stop by and say hello to us.

Well here is a sneak preview of Phill's Christmas Holly Sentiment Stamps which are officially released for sale early next week.


All the products used to create this card will be available on Phill's website very soon. If you would like details of the products and method used for this card please email me and I will send them to you once the products are released.


                                                                  Happy Crafting