
Here is a card made at our regular craft workshops.
This card was made using Phill's Scribbled Craft Dies and coordinating Cosmic Shimmer colour collections.
We have also used Creative Expressions Embossing Folders and Sue Wilson Craft Dies; Succulent Garden and Maidenhair Fern.
The colour used on the main sample card is 'Tangy Tangerine' with the 'Birthday Wishes' Scribbled Craft die Collection. As always we've included cards made using different colours. (all these cards have been made by crafters at our workshops)
Stage 1 - cut out all the card layers and die cuts needed for your project in Bright White Card.
- Base Card - 21cm x 14.5cm
- 1st Layer (Gilding Polish) - 20.5cm x 14cm
- 2nd Layer (Ink Mister) - 20cm x 13.5cm
- 3rd Layer (Gilding Polish) - 18cm x 11.5cm
- 4th Layer (Embossed with Powder) - 17.5cm x 11cm
- 5th Layer (Gilding Polish) - 16cm x 9.5cm
- 6th Layer (Ink Mister) - 15.5cm x 9cm
- Banner - 2.5cm x 12cm
Stage 2 - choose your Cosmic Shimmer Colour collection with coordinating products; Gilding Polish, Ink Mister and Embossing Powder
Stage 3 - Ink Mist the appropriate two layers and leave to dry.

Stage 4 - Gilding Polish to edges of the three appropriate layers and also your flowers as you wish

Stage 5 - Use Perfect Medium and a Speedball Bayer to ink up the rough side of an Embossing Folder. Here we have used Aztec Flowers. Make sure you apply lots of Anti-Static Dust to your white card layer before you put through the machine. When the layer is embossed the sticky Perfect Medium will have been pressed into the de-bossed side of the pattern. Then you can cover with Embossing Powder, remove them excess and heat with a heat tool from underneath.
(TIP - you can feel which side to use as it feels scratchy and rough under your fingers)

Stage 6 - using the same Embossing Powder and Perfect Medium. Press the Die Cut sentiment 'right-side' down into the Perfect Medium. Cover with Embossing Powder, remove the excess and heat. Repeat this at least twice to give a full, shiny coverage on your Die Cut sentiment. Glue the sentiment to your banner using Cosmic Shimmer Dries Clear PVA Glue or highlighter glue.

Stage 7 - stick all your coordinating layers together and shape your flowers and glue together.
Stage 8 - assemble the full card, using foam tape where you wish to add dimension to your layers. Add some bling if you wish. Here we have also used Pearl PVA Glue to create interest on the corners and also in the centre of the flowers.
The Full Card

Here's what we used with links to our website ......
- Craft Dies by Phill Martin - 'Birthday Wishes'
- Cosmic Shimmer Colours by Phill Martin - 'Gilding Polish'
- Cosmic Shimmer Colours by Phill Martin - 'Ink Mister'
- Cosmic Shimmer Colours by Phill Martin - 'Embossing Powder'
- Cosmic Shimmer Colours by Phill Martin - 'PVA Glue'
- Creative Expressions - 'Embossing Folders'
- Creative Expressions Foundations Card - 'Bright White'
- Sue Wilson Craft Dies - 'Succulent Garden'
- Sue Wilson Craft Dies - 'Maidenhair Fern'
- Cosmic Shimmer Dries Clear PVA Glue
- Cosmic Shimmer Glitter Jewels
- Speedball Brayer
- Perfect Medium
- Dovecraft 'Foam Tape'
- Heat Tool
- Woodware - 'Hot Stuff Mat'
Other colour samples......
 |
| Precious Metals Copper and Copper Gilding Polish |
 |
| Precious Metals Titanium and Silver Chrome Golding Polish |
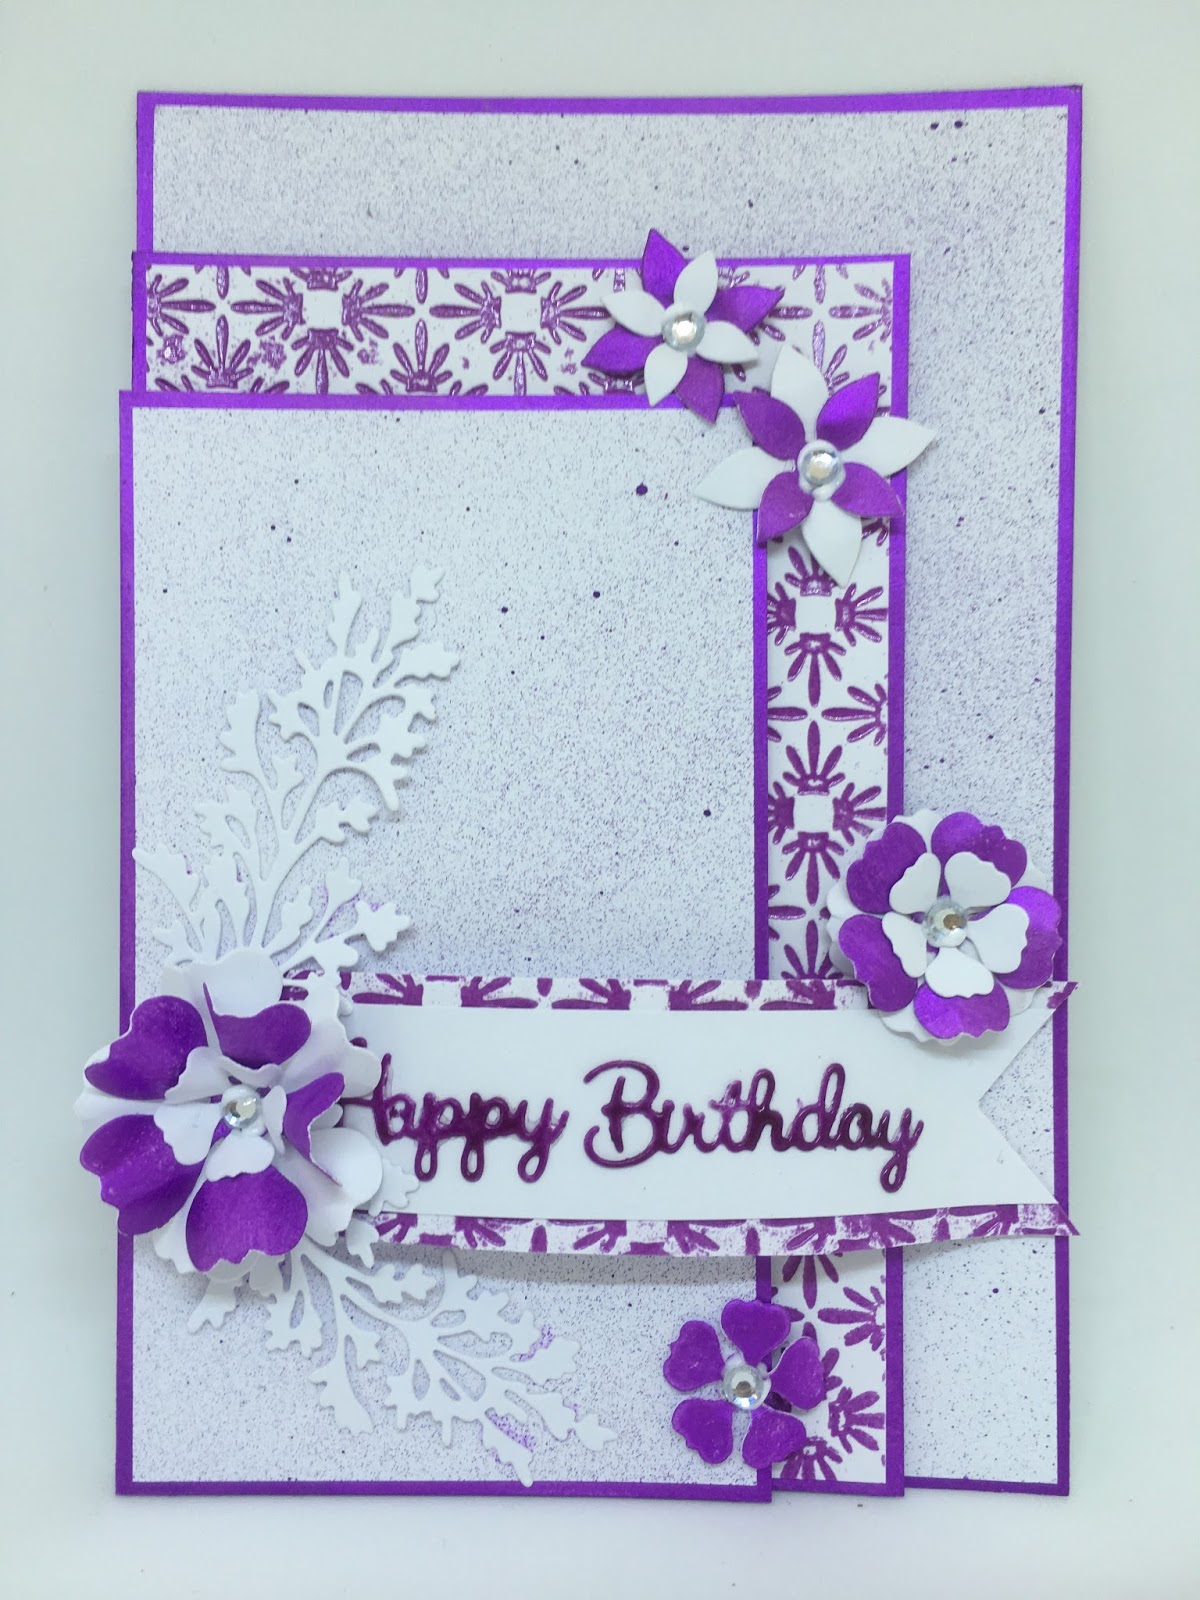 |
| Carnival Colours Purple Paradise |
 |
| Carnival Colours Lush Pink |
 | |
Frosty Heather and Heather Gilding Polish
 PS - Don't forget to 'like' Phill's Facebook page and follow him on Twitter to keep in touch, you can also find him on Pinterest and Instagram for ideas and inspiration :-) PS - Don't forget to 'like' Phill's Facebook page and follow him on Twitter to keep in touch, you can also find him on Pinterest and Instagram for ideas and inspiration :-)
(Links below)
Facebook: Twitter: Pinterest: Instagram: Honeypot Crafts (my website): You Tube Channel: Honeypot Crafts Instagram
|
Hi,
ReplyDeleteThank you for sharing useful information
Here i can share about my experience with clients Looking attractive and high quality Wordpress Ecommerce Portal Development services with low cost. Ecommerce portal design and development services so please feel free to contact us.
Website Designing and Development
Wordpress Website Development
Ecommerce Portal Design and Development
Dynamic Ecommerce Portal Designing
PHP Website Development